Manually embed and position the Selector
By default, GLC places the selector on your store based on your Position settings. However, for certain themes or custom design preferences, you may need to adjust the selector's placement or embed it manually. This guide walks you through both options. If you're not comfortable with editing code, our support team is always ready to help.
I. Choose the Selector Position in GLC
Go to Selector → Customization and select the Desktop or Mobile tab. Each device has its own settings.
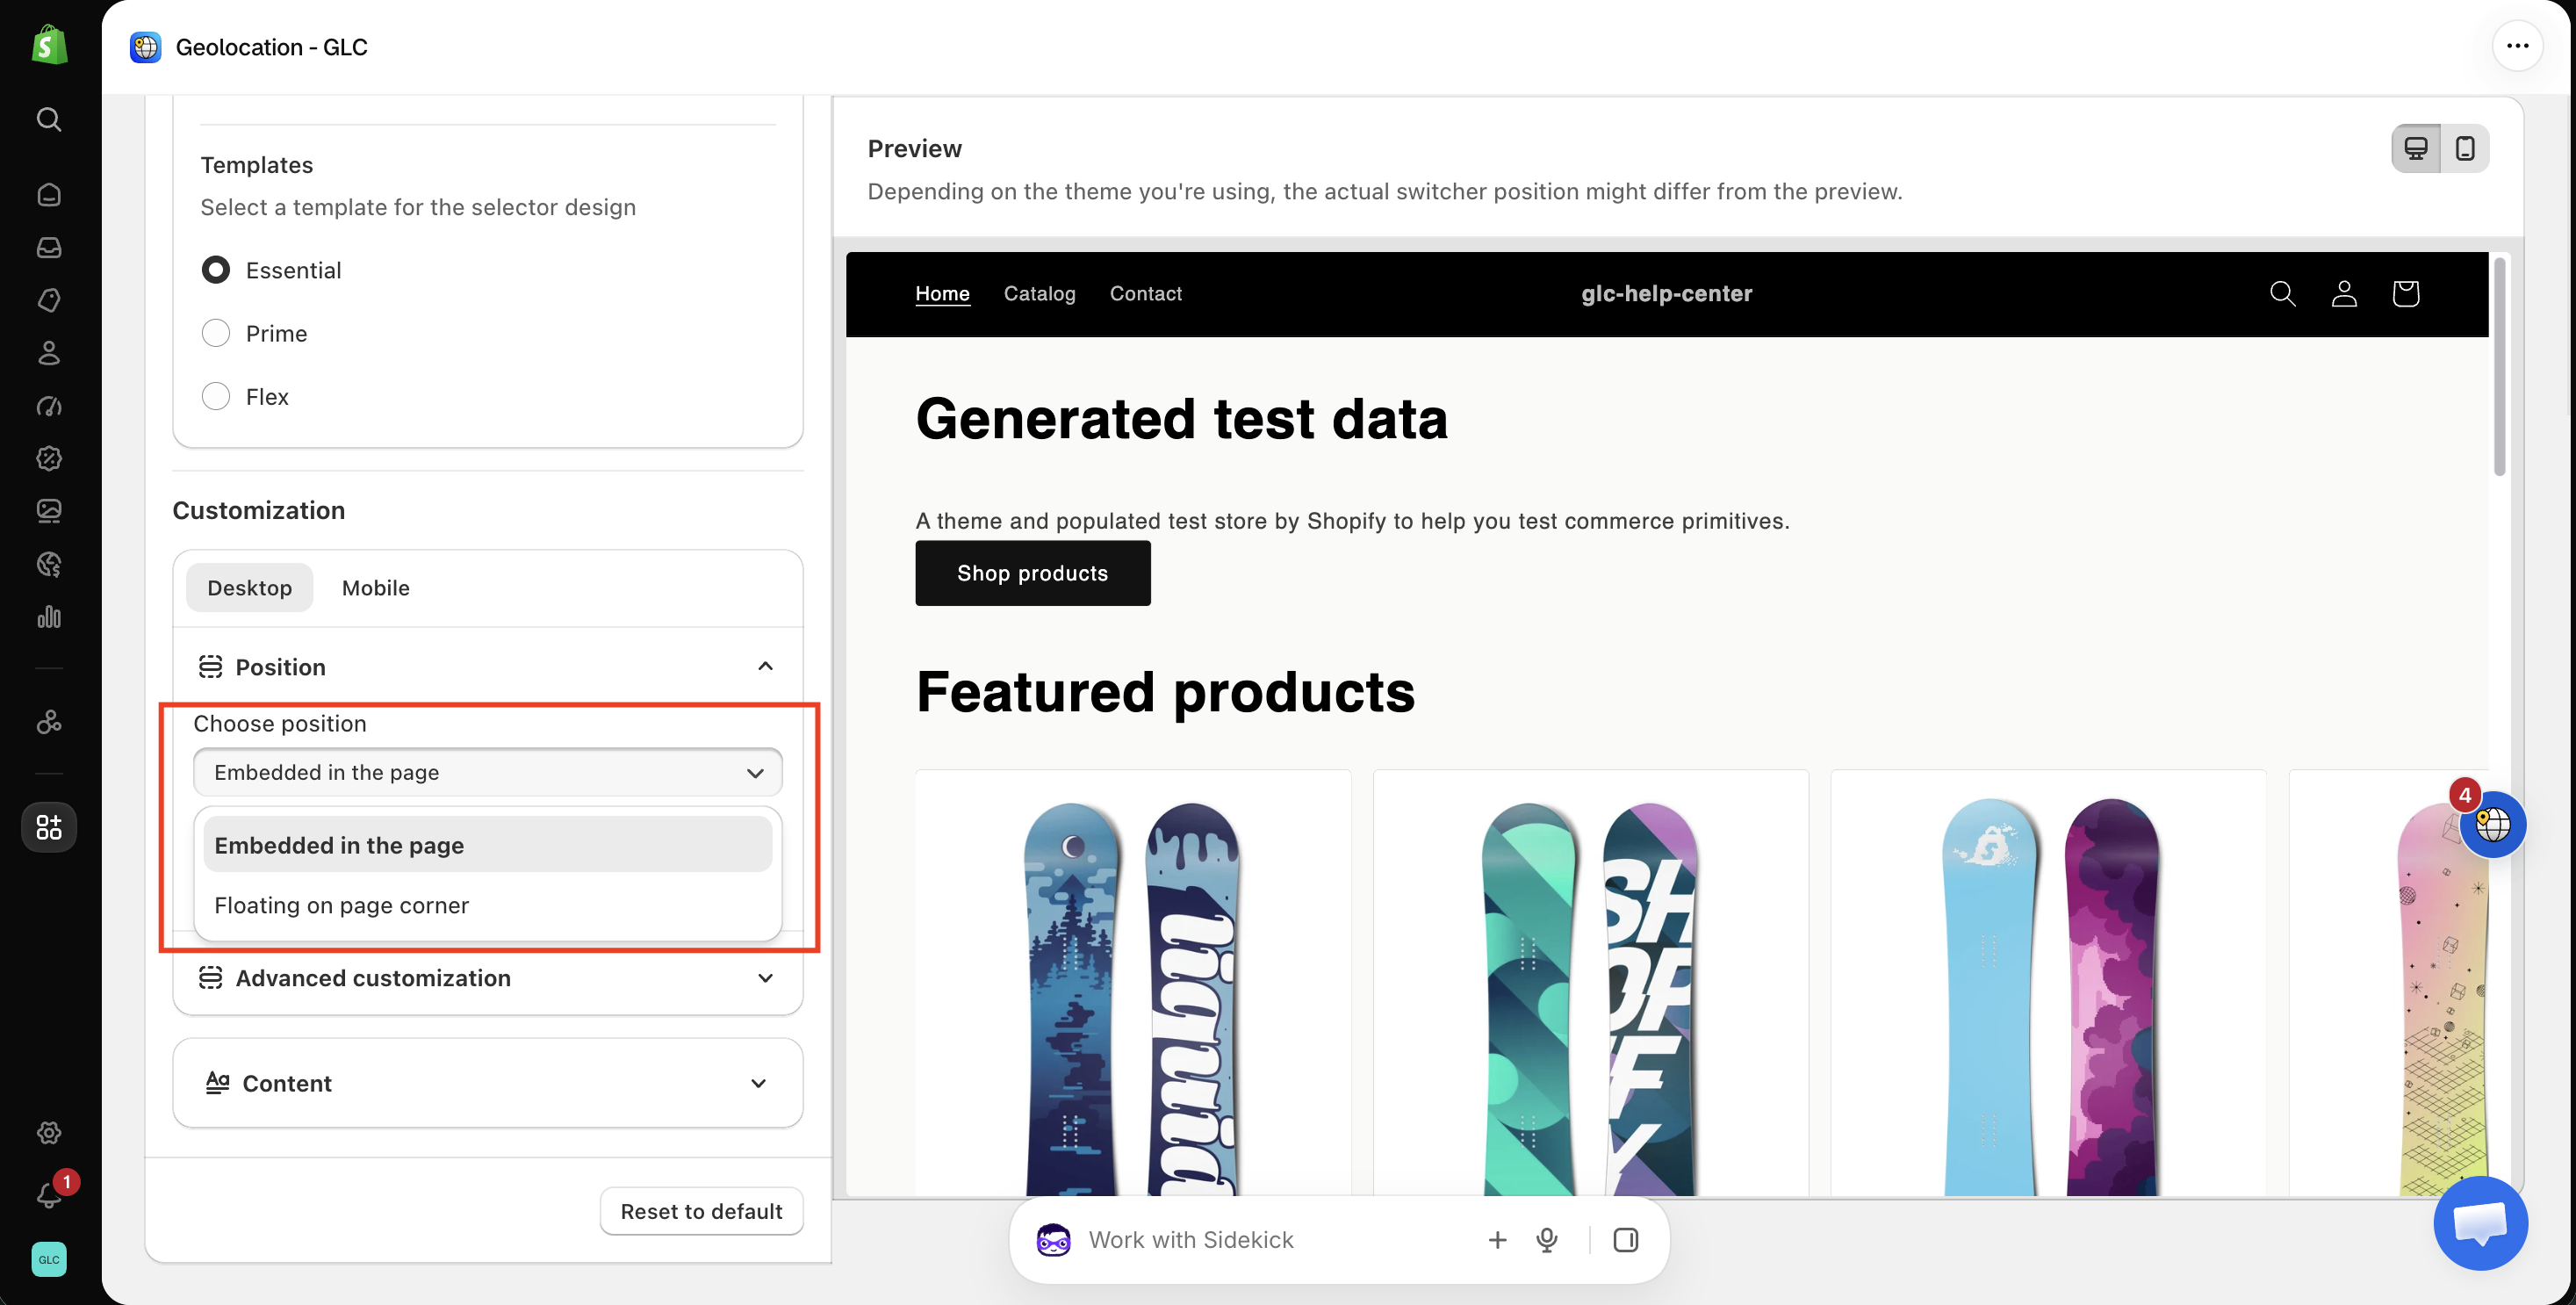
Choose position
We offer 2 convenient positions, each with additional settings to perfectly fit your store's layout:
- Embedded in the page: Integrates seamlessly with your theme's design elements (if your theme supports embedding).
- Floating on page corner: Creates a sleek, non-intrusive selector that follows visitors as they browse.
Placement options
When the selector is embedded in the page, you can choose where it appears:
- In the menu: Displays the selector inside the main navigation menu.
- In the footer: Places the selector in the footer area of the storefront.
- Both in the menu and footer: Shows the selector in both locations for increased accessibility.
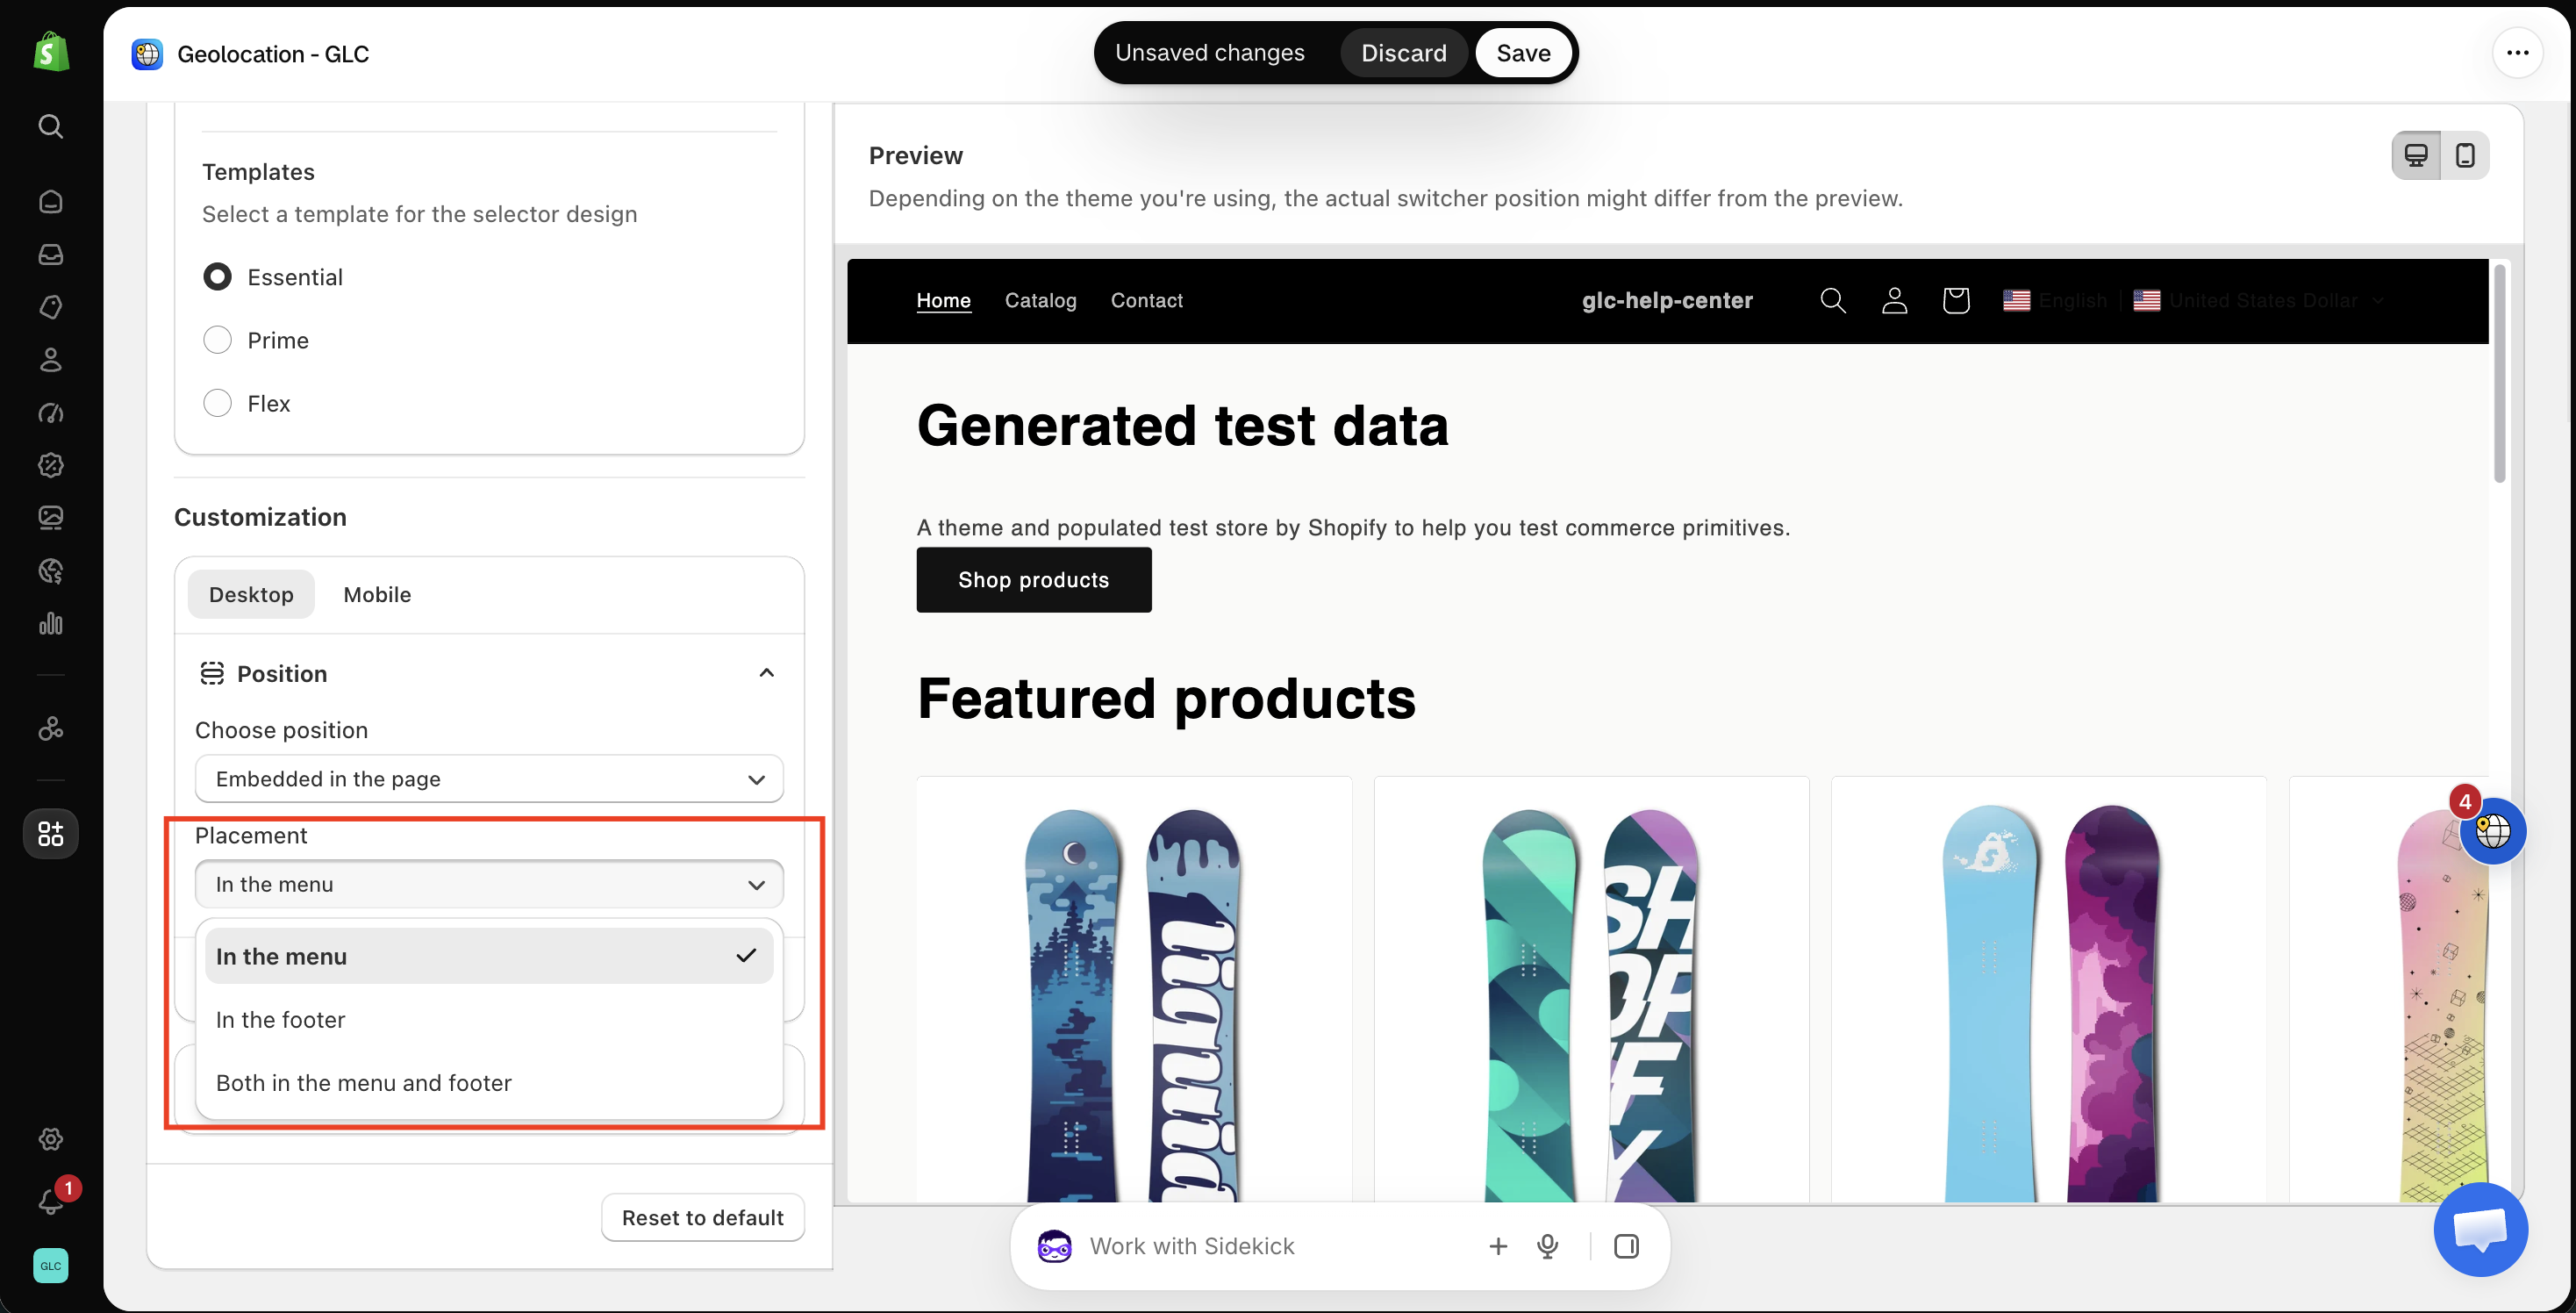
On the Mobile tab, you can also place the selector In the header.
This flexibility allows you to align the selector placement with your theme structure and customer navigation behavior. Click Save to apply your changes. Depending on your theme, the actual selector position might differ slightly from the preview.
II. Embed the Selector Manually
If the selector still isn't positioned the way you want, you can embed it manually in your theme. Please make sure the GLC app embed stays enabled.
Step 1: Access your theme code
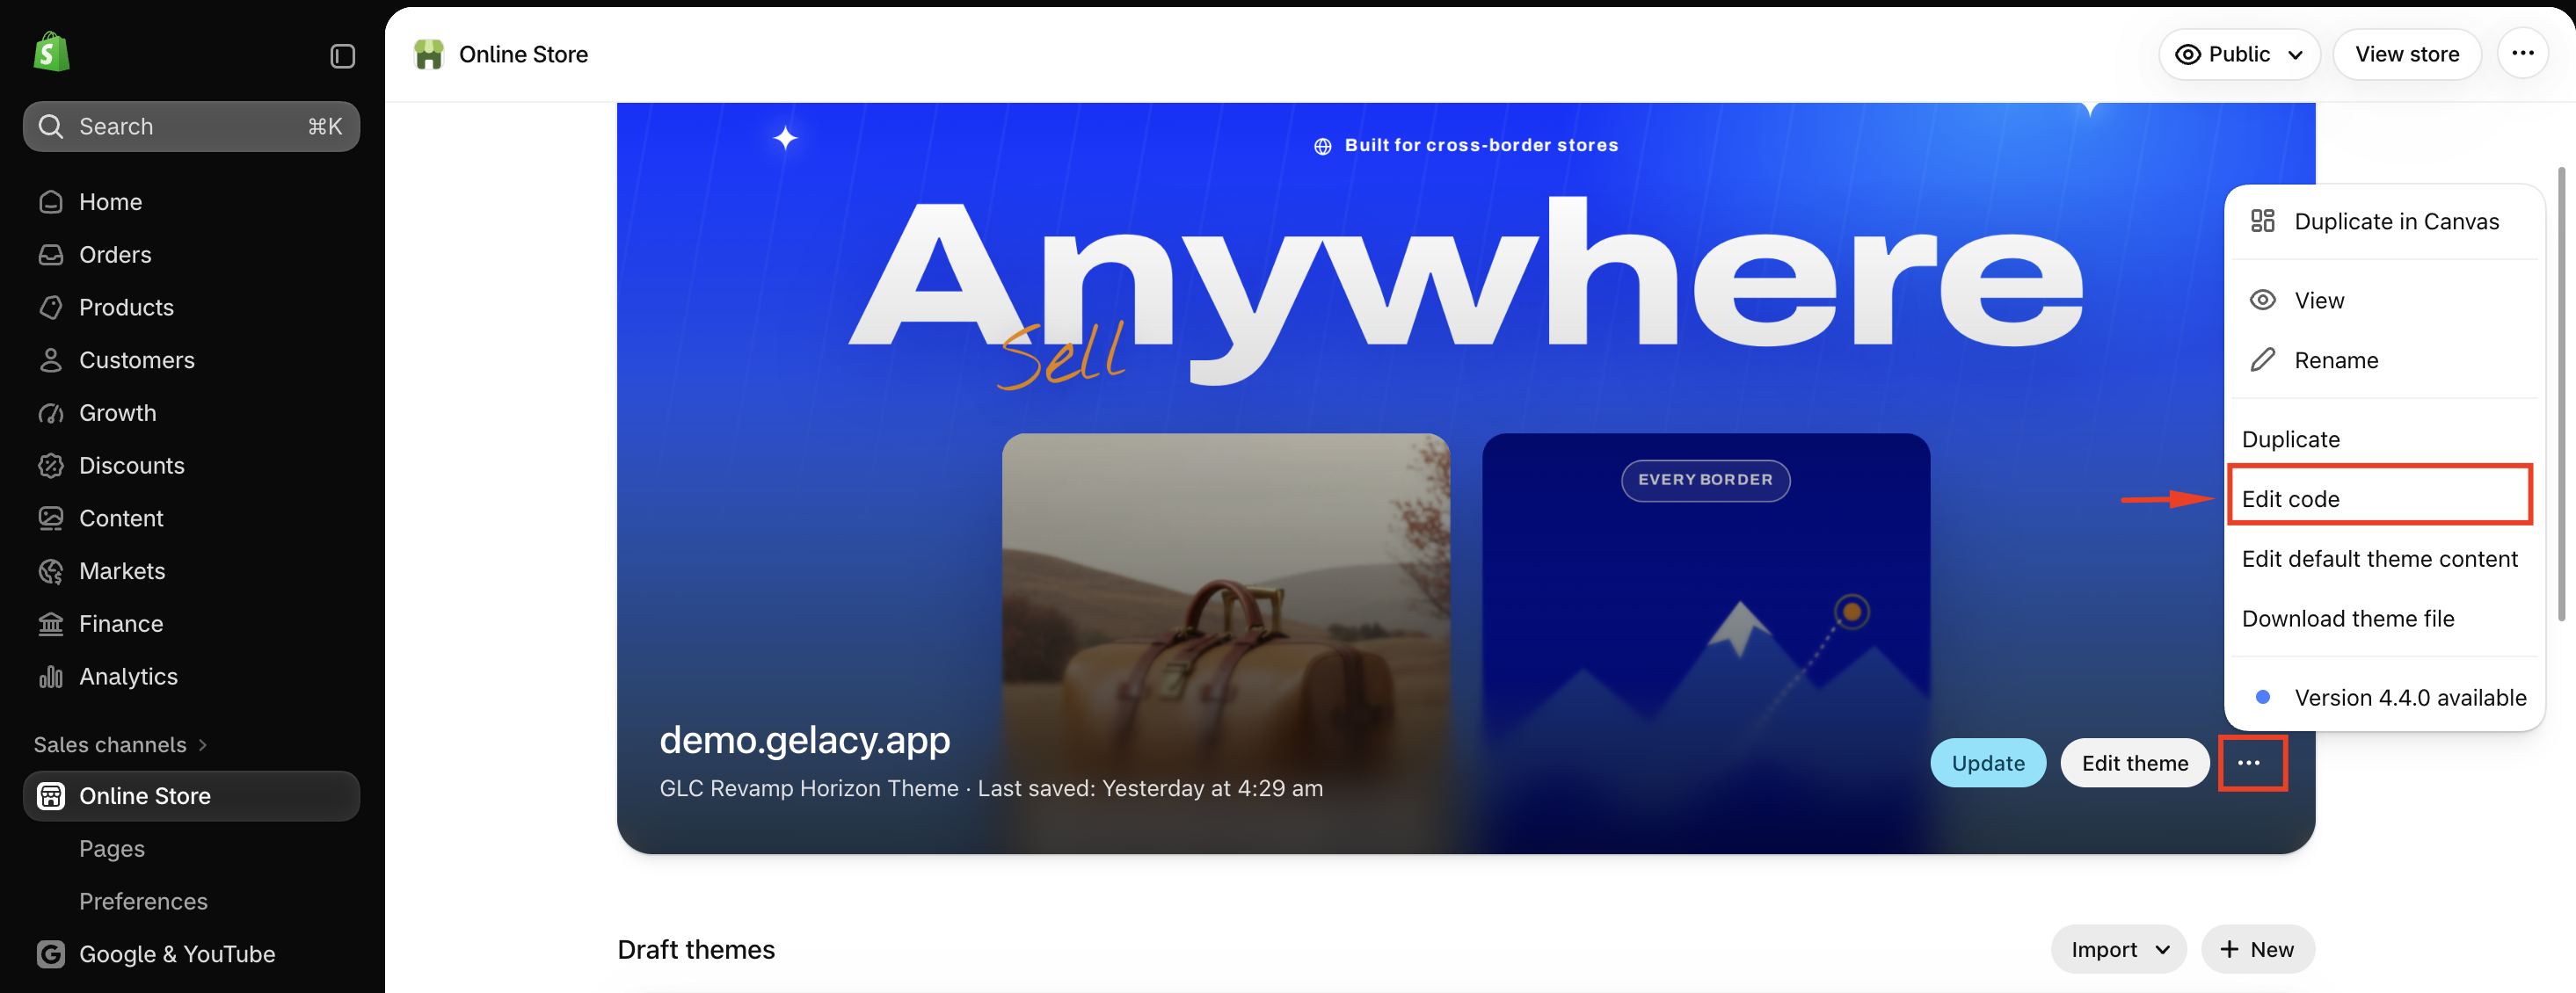
- From your Shopify admin, go to Online Store → Themes.
- Select the theme you want to edit, click the three dots (⋯) → Edit code.
Step 2: Copy the selector code
Copy the code for where you want the selector to appear. Use the desktop code for desktop and the mobile code for mobile.
Menu - desktop
<div id="glc-switcher-manual-desktop"></div>
Menu - mobile
<div id="glc-switcher-manual-mobile"></div>
Footer - desktop
<div id="glc-switcher-footer-manual-desktop"></div>
Footer - mobile
<div id="glc-switcher-footer-manual-mobile"></div>
Step 3: Paste the code into your theme
- Menu: In the theme code editor, find the file that contains your menu, then paste the menu code where you want the selector to appear.
- Footer: Find your footer file, for example
footer.liquid, then paste the footer code where you want the selector to appear.
To show the selector in both the menu and the footer, add both the menu code and the footer code.
Step 4: Save and check
Click Save, then check your storefront on both desktop and mobile.
Need Help?
If you're unsure where to place the code, our support team can embed or reposition the selector for you. Please feel free to contact us at support@gelacy.app for further assistance.