Set up the Selector
Once you've configured your languages and currencies, the next exciting step is setting up your Selector. This powerful feature allows your customers to effortlessly select their preferred shipping country, language, and currency, creating a seamless and personalized shopping experience that drives engagement and sales.
I. General
1. Activate the Selector
Follow Enable the GLC app embed to turn on the GLC app embed in your Shopify Theme Editor.
GLC only works with published themes; it won't function with draft themes. Please consider publishing your theme to make it work.
2. Selector visibility
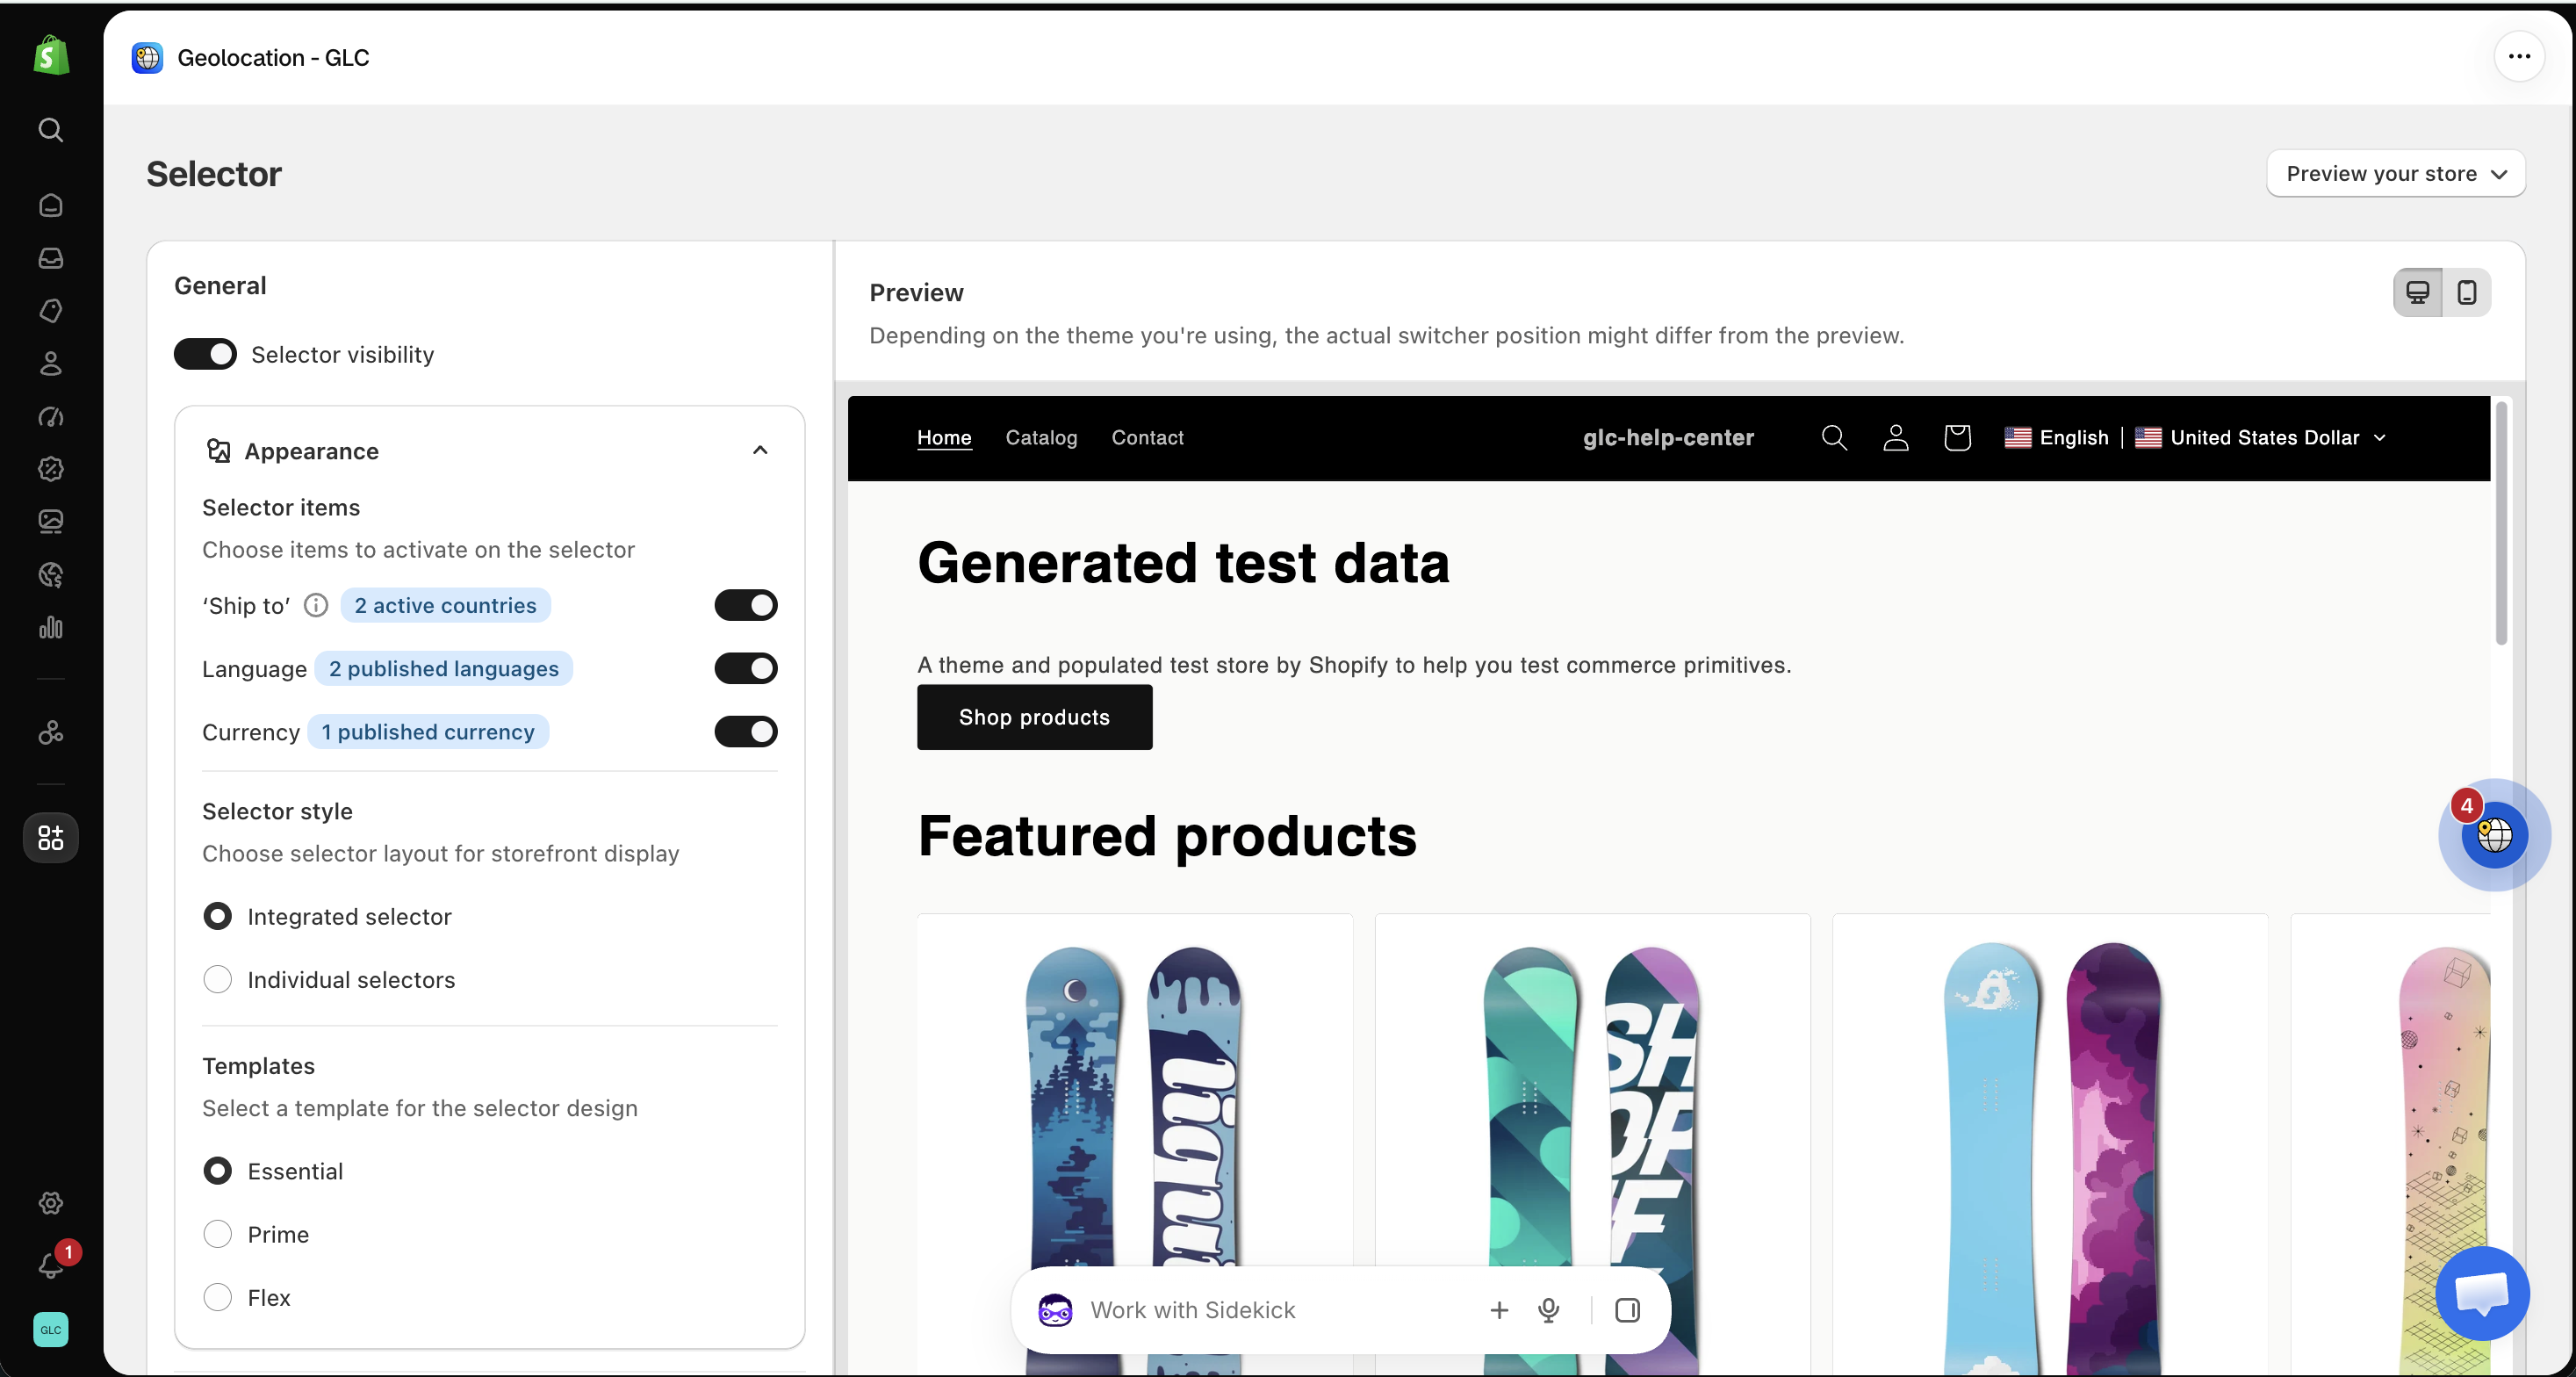
Go to Selector in GLC and use the Selector visibility toggle to show or hide the selector on your storefront.
II. Appearance
The Appearance section, under General, lets you choose what the selector shows, how its items are laid out, and how it looks.
Selector items
You can choose which elements appear in the selector. Each item has its own toggle, giving you full control over what customers see:
- 'Ship to': Displays available shipping destinations, along with the number of active countries configured in your store. Ideal for stores shipping internationally.
- Language: Displays your published storefront languages. Only published languages appear in the selector.
- Currency: Displays your published currencies, allowing customers to view prices in their local currency.
Selector style
The Selector style determines how selector items are displayed on the storefront.
- Integrated selector: Combines country, language, and currency into a single unified selector. Clean, space-efficient, and recommended for most modern storefronts.
- Individual selectors: Displays separate selectors for country, language, and currency. Provides clearer separation but takes more screen space.
Templates
Templates define the visual design of the selector. GLC offers three professionally designed templates: Essential, Prime, and Flex. The Preview on the right shows how each template looks on your store, and you can switch templates at any time to match your theme or branding.
Once you're happy with your settings, click Save.
III. Customization
You can set up all properties of the selector separately on Desktop and Mobile, such as:
- Position: Place or embed your selector exactly where it works best. See Manually embed and position the Selector.
- Advanced customization: Choose how items are displayed and customize the selector colors.
- Content: Edit the labels shown in the selector.
For all customization options, see Customize the Selector appearance and content.
If you're not sure which style or template suits your store, or the Selector doesn't show on your storefront, email us at support@gelacy.app. We'll help you set it up.